How to Make a Topsy Turvy Garden Planter

Save Money and It's Reusable!
I have always wanted to try one of those upside down tomato planter thingies that they advertise on TV. Every year I think about buying one, but the cost always holds me back. Twenty dollars a piece plus shipping (usually about $8.00) each ? A bit pricey for tomatoes, I always think and trudge out and plant mine in the ground. This year I saw them in WalMart, and I opened the box and looked inside to see what exactly you get for your money. I was shocked at the simplicity of what they charge $20 for. "I could make this for $5.00," I thought to myself.
So that is exactly what I did, and you can too ! Follow the simple instructions below and make your own upside down planter, and as an added bonus, your home-made planter allows you to plant in the top as well as the bottom ! Check it out !
Photo from Flickr.com
What You Will Need - Easy To Find
1. Plastic Bucket. You can also use a large plastic flower pot, but if you do, you will need to improvise a handle to hang it with.
2. Soil. I suggest Miracle Gro Potting Soil, or some type of vegetable specific soil with fertilizer already mixed in.
3. One inch thick piece of styrofoam big enough to cover the bottom of the bucket
4. Vegetable plants. Either three or four, depending on if you decide to put two upside down, or one. It is better if you choose cherry tomatoes, or other very small tomato so the weight will not overstress the vines.


How To Put It Together
What to do next.....
Turn the bucket over so that the bottom is facing up. You can hang one or two plants upside down. If you plan to hang one plant, then you will need to cut a hole in the middle of the bottom of the bucket. If you plan to hang two plants, then you need to cut two holes opposite of each other about one half inch from the edge of the bucket.
Take the styrofoam and cut it into a circle to fit in the bottom of the bucket. Turn the bucket back right side up and place the styrofoam into the bottom of the bucket. Take a pencil and carefully poke a hole in the styrofoam in the same spot as the holes in the bottom of the bucket. Pull out the styrofoam and with a straight edge draw a line between the two pencil holes, and cut the styrofoam circle in half, along that line. Once the styrofoam is in two pieces, enlarge the holes in the styrofoam to about the side of half a quarter.
Take one half of the styrofoam back in the bucket bottom and take your vegetable plant and tug it gently out of the pot. Gently drop the plant through the hole in the bucket, upside down, letting the rootball keep it from falling through. Slide the other piece of styrofoam into the bottom of the bucket, locking the rootball above the styrofoam and the plant below, hanging out of the bucket bottom.
Hang the planter up, or have someone hold it up while you begin adding the soil into the pot around the rootball. Pack it in with your fingers, but not too hard. Once you have it about half way full, you may want to sprinkle some slow release fertilizer over the soil, if your soil does not already have fertilizer in it. Finish filling it with soil to about 2 to 3 inches from the top.
You can use the regular bucket handle to hang up your planter, or you can remove the handle and use the holes make a more decorative hanger out of colored rope or wire.
Plant Vegetables in the Top if You Like
Helps keep the soil cooler and shaded
Optionally, you can put some smaller plants in the top of the bucket. Doing so will help to shade the soil in the bucket and keep it cooler. The top of your upside down planter is the perfect place to grow herbs, or small cherry tomatoes. You could even plant flowers in it, to dress up your planter, if you plan to hang it on your deck or in your yard. Whatever you choose to put in the top, make sure it is not something that grows taller than 6 or 7 inches.
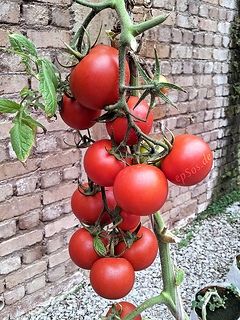
Cherry Tomatoes are Perfect for the Top

Some Smart Advice from a Reader
guardianstar77
A reader of this page offered some friendly advice that if you live in an area with high winds, you will want to take down your hanging planter in times of high wind. She had her entire hanging crop destroyed in a windstorm, don't let this happen to you!
I have also lost a few tomatoes in a windstorm, as in I had ten luscious tomatoes on my vine and after a particularly bad storm, I came back to only six. :( You may want to hang your planter in an area that is somewhat sheltered from the wind.
Maintenance of your Planter
If you live in a cold climate
When the summer is over, and you have grown all your delicious veggies, fruits or flowers, you need to take these steps to take proper care of your planter and make sure it is whole and ready to use for the next growing season.
1. Cut the plants off one inch from the bottom of the planter.
2. Pull out all the plants that are planted in the top, if any.
3 Take your planter down and turn it upside down and shake it, letting all the soil and the styrofoam fall out of the bucket. Carefully pull the styrofoam pieces away from the soil and thoroughly rinse them off with water. (a garden hose works nicely)
4. Rinse the bucket off both inside and out, using a sponge or brush to dislodge all the soil particles that are sticking to the sides. When it is clean, store the styrofoam pieces inside and put the bucket away with the rest of the gardening items. It is ok to store them your planter in an unheated garage or toolshed, as long the bucket is empty of all soil.
**WARNING** Failure to remove the soil from the bucket may result in the soil freezing over the winter and expanding, which may crack your bucket, making it unuseable. It is very important that you remove the soil from your bucket before freezing temperatures.

Do You Love Gardening?
How about Cooking, Sewing and Crafts?
If you do, you might want to visit my Blog Homemade by Jade This blog is dedicated to reviving the skills of "homemade." Most of the posts are about gardening, cooking, sewing, crafts and DIY household projects.
Some Other Page You May Enjoy
Elevated Garden Bed - The Easiest Way to Grow Vegetables
Elevated garden beds are just about the perfect way to grow veggies (or flowers) for many reasons. First and foremost, you never have to kneel or bend over t...
Aloe Vera - Should You Be Eating It?
I have believed in the medicinal value of Aloe Vera my whole life. My mother had a big pot of it growing on the back porch ever since I was a child. Whenever...


